 |
| Basic quilling shapes |
Quilling starts with rolling , shaping a strip of paper into a coil and then pinching the coil into various unique shapes. Once you create a beautiful shape , it can be used to design your greeting card , jewellery , quilling boxes , wall hangings etc.
These are different sized quilling paper which is used for quilling art.
3 mm , 5 mm , 7 mm , 10 mm , 20 mm and 25 mm.
There are various colors of quilling strips available.
In this article I am going to show you the different quilling shapes which will be useful for you to make your unique quilling art. The basic tools used for quilling are :
- Quilling needle - This is the basic quilling tool which is used to roll the paper to make coils. You need to insert one end of the quilling strip into the slot of the quilling needle and start rolling. Keep rolling the paper until the whole strip is twisted on the quilling needle.
 |
| Quilling needle |
- Quilling comb - This looks more like a metal comb with prongs. It is used to make coils and paper flowers. The distance between the prongs can create different sized coils. It is mainly used to make evenly shaped loops inside each coil. Coils made with a quilling comb are generally bigger than those made with a quilling needle. Insert a quilling strip in between the prongs of the comb and wrap one end around three prongs to make a small loop. Then wrap the complete strip upwards. You can increase / decrease the number of wrappings around the prongs.
 |
| Quilling comb |
- Crimping tool - It is a plastic tool which is used to crimp a quilling strip to make beautiful designs. You simply need to insert a quilling strip between the two gears and rotate using the plastic handle. As you rotate, the paper strip comes out crimped. This can be used to make earrings , wall hangings , flowers and many more.
 |
| Crimping tool |
Fevicol is used for sticking the coils.
I will explain the basic quilling shapes in detail.
- Tight coil - Insert the paper strip in the quilling needle and roll it either clockwise or anticlockwise till the end . You can use your thumb and index finger for making rolling comfortable. After rolling to the desired size, apply the glue to the end of strip and slide off the quilling needle (remember to glue ends before you remove, else the coil will expand and you won't get a tight coil). Remove the coil and you will have a tight coil.
 |
| Tight coil |
- Loose coil - Roll a quilling strip using the quilling needle to your desired size, remove the needle and allow the coil to relax, and glue the end. This is called a loose coil and it is the basic shape from which many other shapes are made as explained below (viz Tear drop, Petal, Marquise, etc ... ) .
 |
Loose coil
|
- Tear drop - Make a loose coil ( Step 1 ) as explained above and pinch the coil on one end using your thumb and index finger ( Step 2 ) forming a shape with a point at one end and leaving the other end rounded.
 |
| Tear drop |
- Petal- Make a tear drop. Then gently press the pointed end to one side to give it a curved shape. This will give a petal shape.
 |
| Petal |
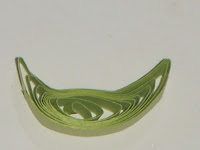
- Marquise ( eye ) - Roll a loose coil as shown in step 1. Using both hands hold the circumference of the coil between your left and right, thumb and index fingers. Pinch the base loose coil at the opposite sides at the same time as shown in step 2 , you should see coil getting the shape as shown in the picture below.
 |
| Marquise |
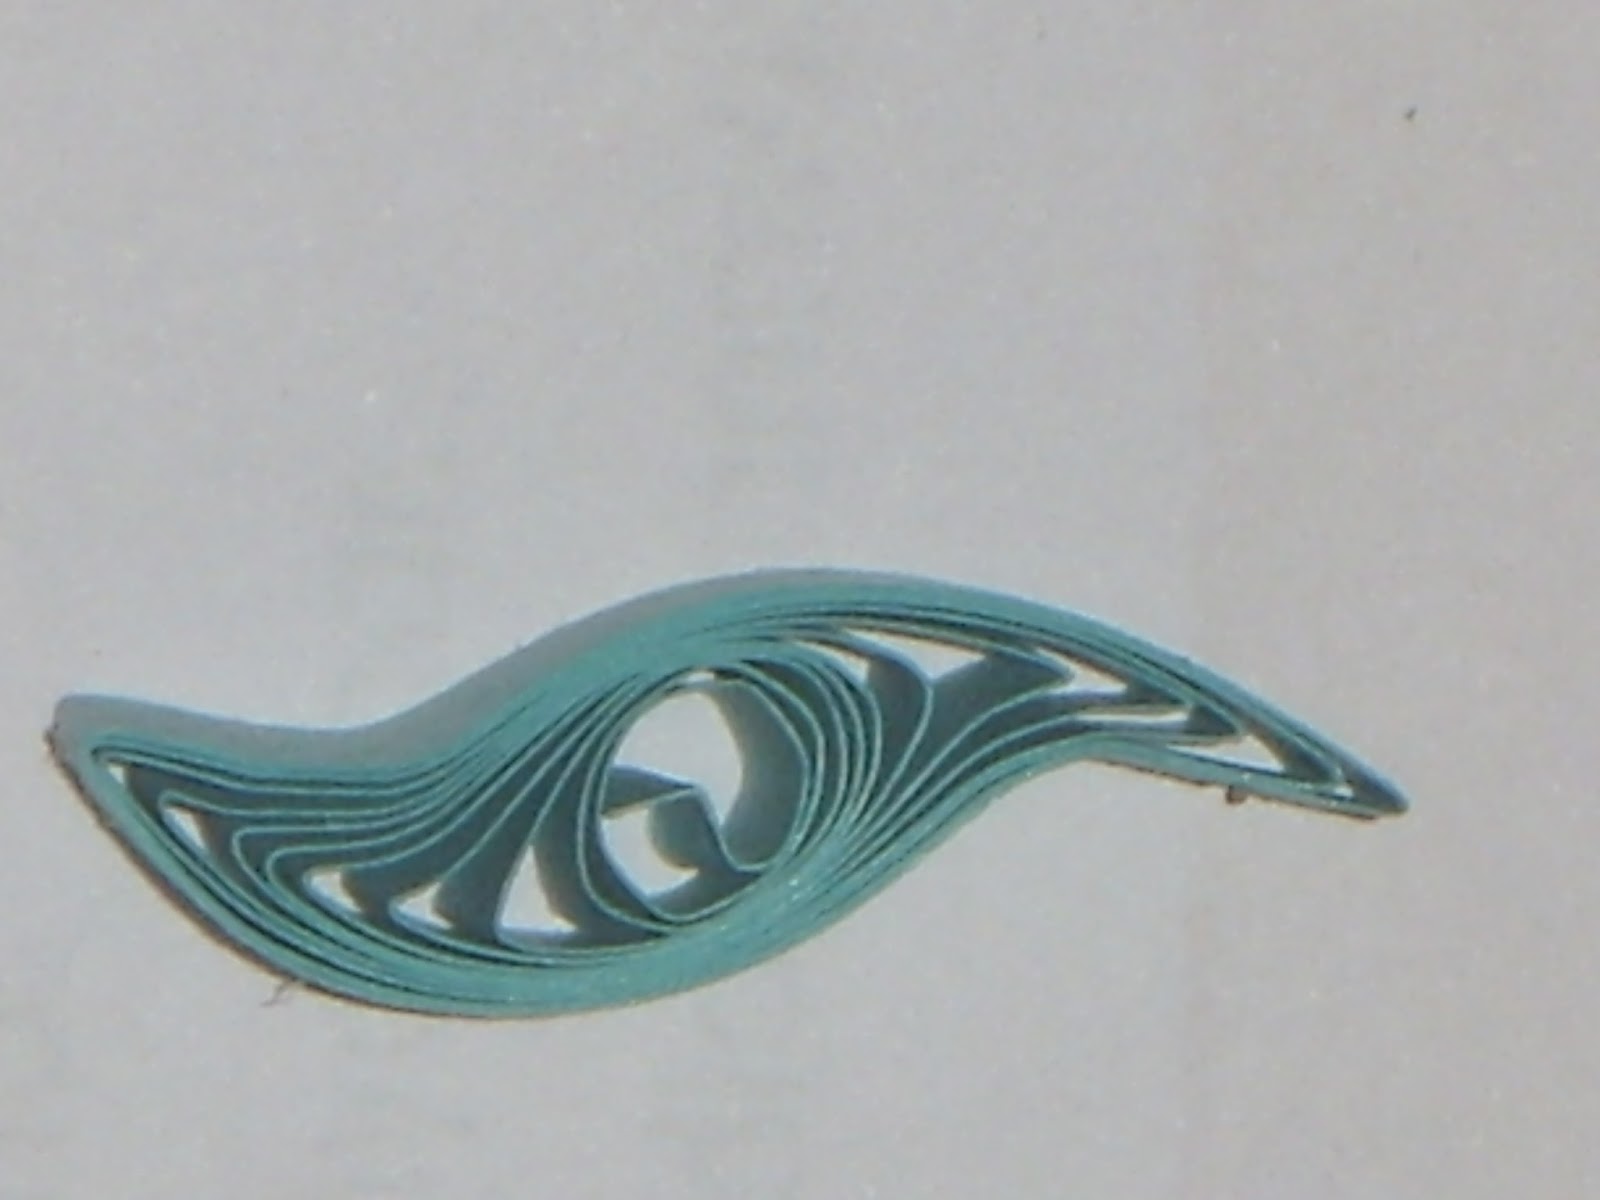
- Curved marquise ( leaf ) - Make a marquise. Then curve the pinched ends in the opposite direction using your finger nail to give a leaf shape.
 |
| Curved Marquise |
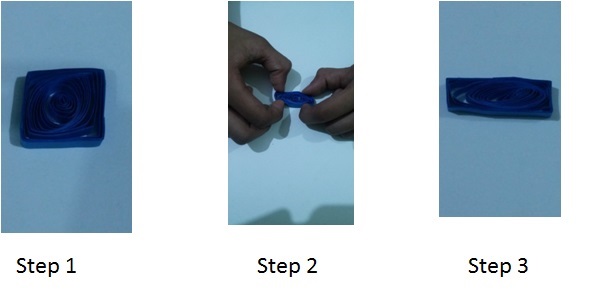
- Quilled square - Using the base loose coil, pinch on the circumference sightly (not to the extent as we make a marquise) as shown in step1 . Then turn it ninety degrees and pinch two more points exactly on the opposite to the point pinched first , ensure each side should be of the same size while forming a square ( Refer to step 2 ), alternatively you can use a quilling mould to make a square by placing on the mould.
- Quilled rectangle - Make a quilled square ( Step 1 ) . Then turn it slightly and pinch as shown in step 2. There should be two short sides and two long sides forming a rectangle.
 |
| Quilled rectangle |
- Quilled curved half circle ( crescent ) - Make a marquise, then bend both the pinched ends upwards to get a curve . This will give the shape of a crescent moon.
 |
| Quilled cresent |
- Quilled heart- Make a tear drop. Press in the base of the shape with your finger/ needle to make a small indentation . This forms a heart shape.
 |
| Quilled heart |
- Quilled triangle -Make a tear drop. In one hand hold the tear drop between your thumb and index finger. With the other hand , press the rounded end inward to form three points to get a triangle shape.
 |
| Quilled triangle |
- Quilled cone - Make a tight coil , slightly push face of the coil with your finger or needle inwards to get a cone shape. This shape is mainly used in jewellery to make earrings , jhumkas etc...
 |
| Quilled cone |
Scroll shapes - Scroll shapes are made by rolling the quilling paper but not gluing the end. You can just roll both the ends of the paper in opposite direction , or you can fold and then roll both ends. You can make your own shape. I have mainly used two scroll shapes in my posts.
- S - Scroll - Loosely roll one end of a quilling strip half way down. Flip the paper and loosely roll the other end in the opposite direction to form an " S " shape. Please do not glue.
 |
| S - Scroll |
- V - Scroll - Fold the strip of quilling paper in half. Loosely roll each end outward to form a " V " shape. Do not glue.
 |
| V - Scroll |
These are the some of the quilling shapes which I have used in my articles. I hope this will be useful for you to create your beautiful quilling designs.
The more you practice , the more beautiful your quilling art will look.
Please feel free to send your queries and comments .


Good idea to give a basic knowledge of quilling and to make basic items
ReplyDeleteVery nice article , good to even add video for beginners it might help and also cringed shapes and shapes using comb - will they be covered in separate article ? keep the good job going
ReplyDeleteThanks, the crimped paper can also be used to make basic shapes flowers. And about comb, I will show in my coming blogs.
ReplyDeleteThanks, the crimped paper can also be used to make basic shapes flowers. And about comb, I will show in my coming blogs.
ReplyDelete